Want to make your own flax seed heat packs?
This guide goes over how to make your own flax seed heat pack. I wanted to make a little something to use in our massage therapy clinic, particularly for warming cervical areas as a wrap. These flax seed heat packs are perfect for massage. They can also be used as cold packs, or used as a cervical hot/cold bolster. I have found the flax seed packs to be far more adaptable than the cervical thermophores that are electric or hydrocollaters that are kept in water.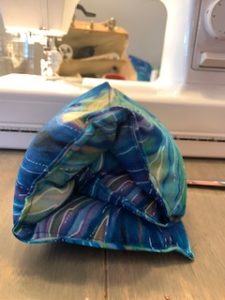
I particularly like these flax seed packs better than the other options I have used because I feel their shape is far more adaptable and there is something soothing about the weight to them. I’s kind of like a pleasant warm bean bag, and even without heat it is a nice ‘sensory’ weight. I use them frequently myself when I have tension headaches by laying on the floor and using it as a warm cervical bolster. Like in this pic—>
I have a significant background in sewing, so this flax seed heat pack is an easy project for me…if you have never sewed before, it might be ‘easy/moderate’. It is mostly straight lines and the only really challenging bit is the last step, where you have to keep the seeds in and sew at the same time. (more on that later)
What you will need for this DYI flax seed hot pack project:
- Flax seed (I bought a 10 lb bag from Amazon and it made about 10 packs)
- Sewing machine
- Cotton or poly-cotton fabric (I used this quilting fabric from Amazon and it made about 5 packs)
- Shears
- Needle and thread (of matching or complementary color)
- Wax pen
- Measuring tool
The first step to making your flax seed heat pack:
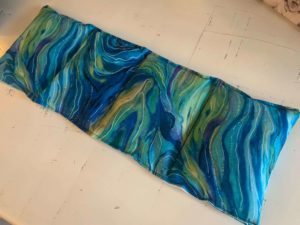
Iron your fabric out so when you cut it it is nice and smooth. After that you will cut it into the desired lengths. If you do not have proper shears, make sure you at least have some very sharp scissors. I wanted my flax seed packs to be about 4 inches by 16 inches as I wanted to use them for the cervical spine.
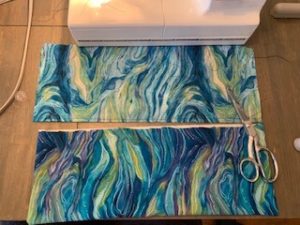
If you want to have a little fun with the project, you can make your hot packs any shape: hearts, squares, triangles, you name it. To do this you need to leave a little at each end for the seams, as well as one seam that can be the fold if you’re lazy 🙂 I cut my fabric into 10″x 16″ segments, and then folded it in half with the BAD SIDE out, and ironed it again.
Once you have re-ironed, make sure all the edges line up as square. Make any adjustments you need as far as making the item symmetrical if you goofed. Now you are going to get ready to sew. I want to make sure my machine is set to a small stitch so that it can contain the flax and use a heavier-weight thread if my machine will take it. That makes sure you do not have an exploding flax seed hot pack down the line:)
 Sewing your flax seed heat pack:
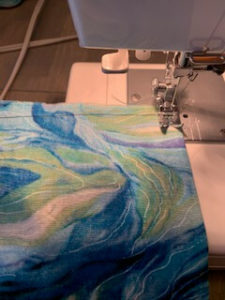
Once I am ready to sew. I start with a back stitch at the open end of the short side to make sure the seam will not unravel in time (you can do this by sewing forward, then back and then forward again) Then I sew down one of the short sides to the fold, leaving about 1/4 inch of the fabric’s edge. When I reach the corner, I do a little back stitch again for integrity, then make a turn by lifting the presser foot and moving the fabric with the needle down. Now sew along the FOLDED edge, leaving 1/4 inch of a edge or less. When I reach the corner, again I back stitch and use the same method for the turn, then sew back up the last short side.
This should leave you with what looks like an ugly fabric envelope. Let’s make it less ugly by turning it inside out, so now the good side of the fabric faces out. Guess what? Time to iron again! Iron everything flat, so the corners are square (you may need a tool to poke them out) Now you should have a pretty envelope that is open on one side, but not on the folded side. (I sew that side even though its folded for extra strength and so that the look matches all the way around, but you do not have to.)
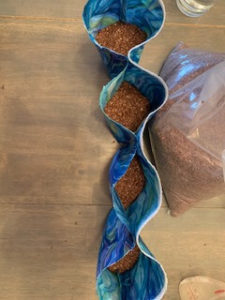
Now it is time to get out your wax pencil and mark off where you are sewing next. This step is totally optional. You can certainly just make a big floppy bag, but I like mine to have the flax seeds divided up so it is weighted evenly and so I can fold it into a cervical pillow. I measure and draw lines to divide my envelope into 4 even chunks of 4 inches (ish).
 Mark your envelope so it is square and even. I use a straight edge piece of paper to do it or a ruler. Once you have marked, you are going to sew (using a back stitch at the start) from the already sewed side, to the open side. Stop about 1/2 of an inch from the open end (you will need this to fold your fabric over)
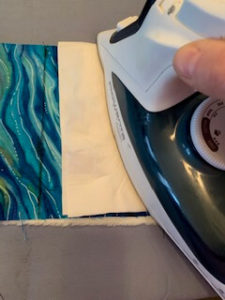
You might notice now you have some markings on your fabric that you do not want. There are a few options: you can wash your fabric, or you can iron over it with a paper buffer to pull up the wax.
Yay! We are so close to being done. We just need to fill the bags with flax seeds and sew one final edge. I fill each pocket about 1/2 to 2/3 full, the important thing is that they are all filled to the same height. You may need a measuring cup and a funnel to do this properly. (if you are a scent person now would be the time you could put in some lavender buds or cloves. I do not because we have a medical massage location where we use limited scents)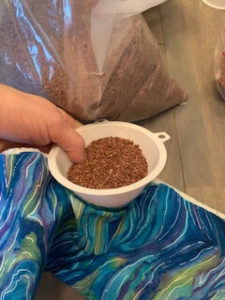
Once the flax seed is in the bags, then you need to fold over the open edge so that BOTH edges are on the inside and pin it closed. If you are new to sewing I recommend pinning it closed and basting by hand a line of thread right next to the flax, that will keep the flax in place while you sew and keep a clean area between the pins and flax…otherwise it can get messy.(this is pretty easy and just involves hand sewing a thread line, when you are done with the project you cut the knotted end of the thread and pull it out completely.)
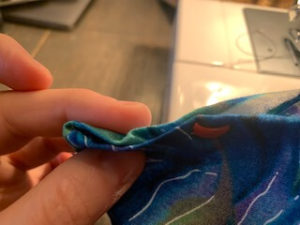 Once you are set up to sew the last edge…DO IT! You just want to make sure you are back stitching to start and end, and that you are catching the folded-over pieces in the seam. Because there is flax in there, one side of the fabric is going to be very heavy, so I help my machine a little by lifting it up and keeping the tension off the needle.
Finishing up your flax seed heat pack:
When you are finished, trim up any dangling threads…and that is it! You are ready to use. They make excellent gifts or therapy tools. To heat them, you will want to put them in the microwave for 30-45 seconds. Test that many microwaves are different. We also put them in dry hot cabbi’s. Full disclosure: if you are making them for therapy use you are going to want to make a cover, or many covers, like we did…but that is another project:)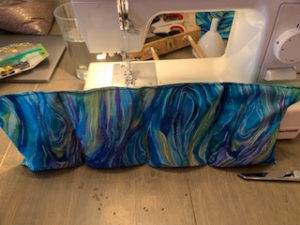
Enjoy!